While drawing wing ribs in AutoCad is an interesting endeavor, [EDIT 2/20/2024: I cannot recommend the CAD route. I have edited the previous post on this topic to indicate why this is a waste of time, and how it went wrong for me.] nothing sets the aviator apart from the idle dreamer like sawing spruce, and spreading glue. True to Mr. Pietenpol’s intention to make the design approachable, all of the sticks in rib of the wing are 1/4 x 1/2 inch cap strip. Fabrication of these pieces began with a purchase of rough-sawn Sitka Spruce from McCormick Lumber in Madison, WI. Great care was exercised in selecting the timber purchased to maximize the amount of usable material. Criterion for this judgement can be found in AC 43.13-1B section 1-2, and ANC-19. The former is a document published by the FAA, and the latter is a war-era military specification.
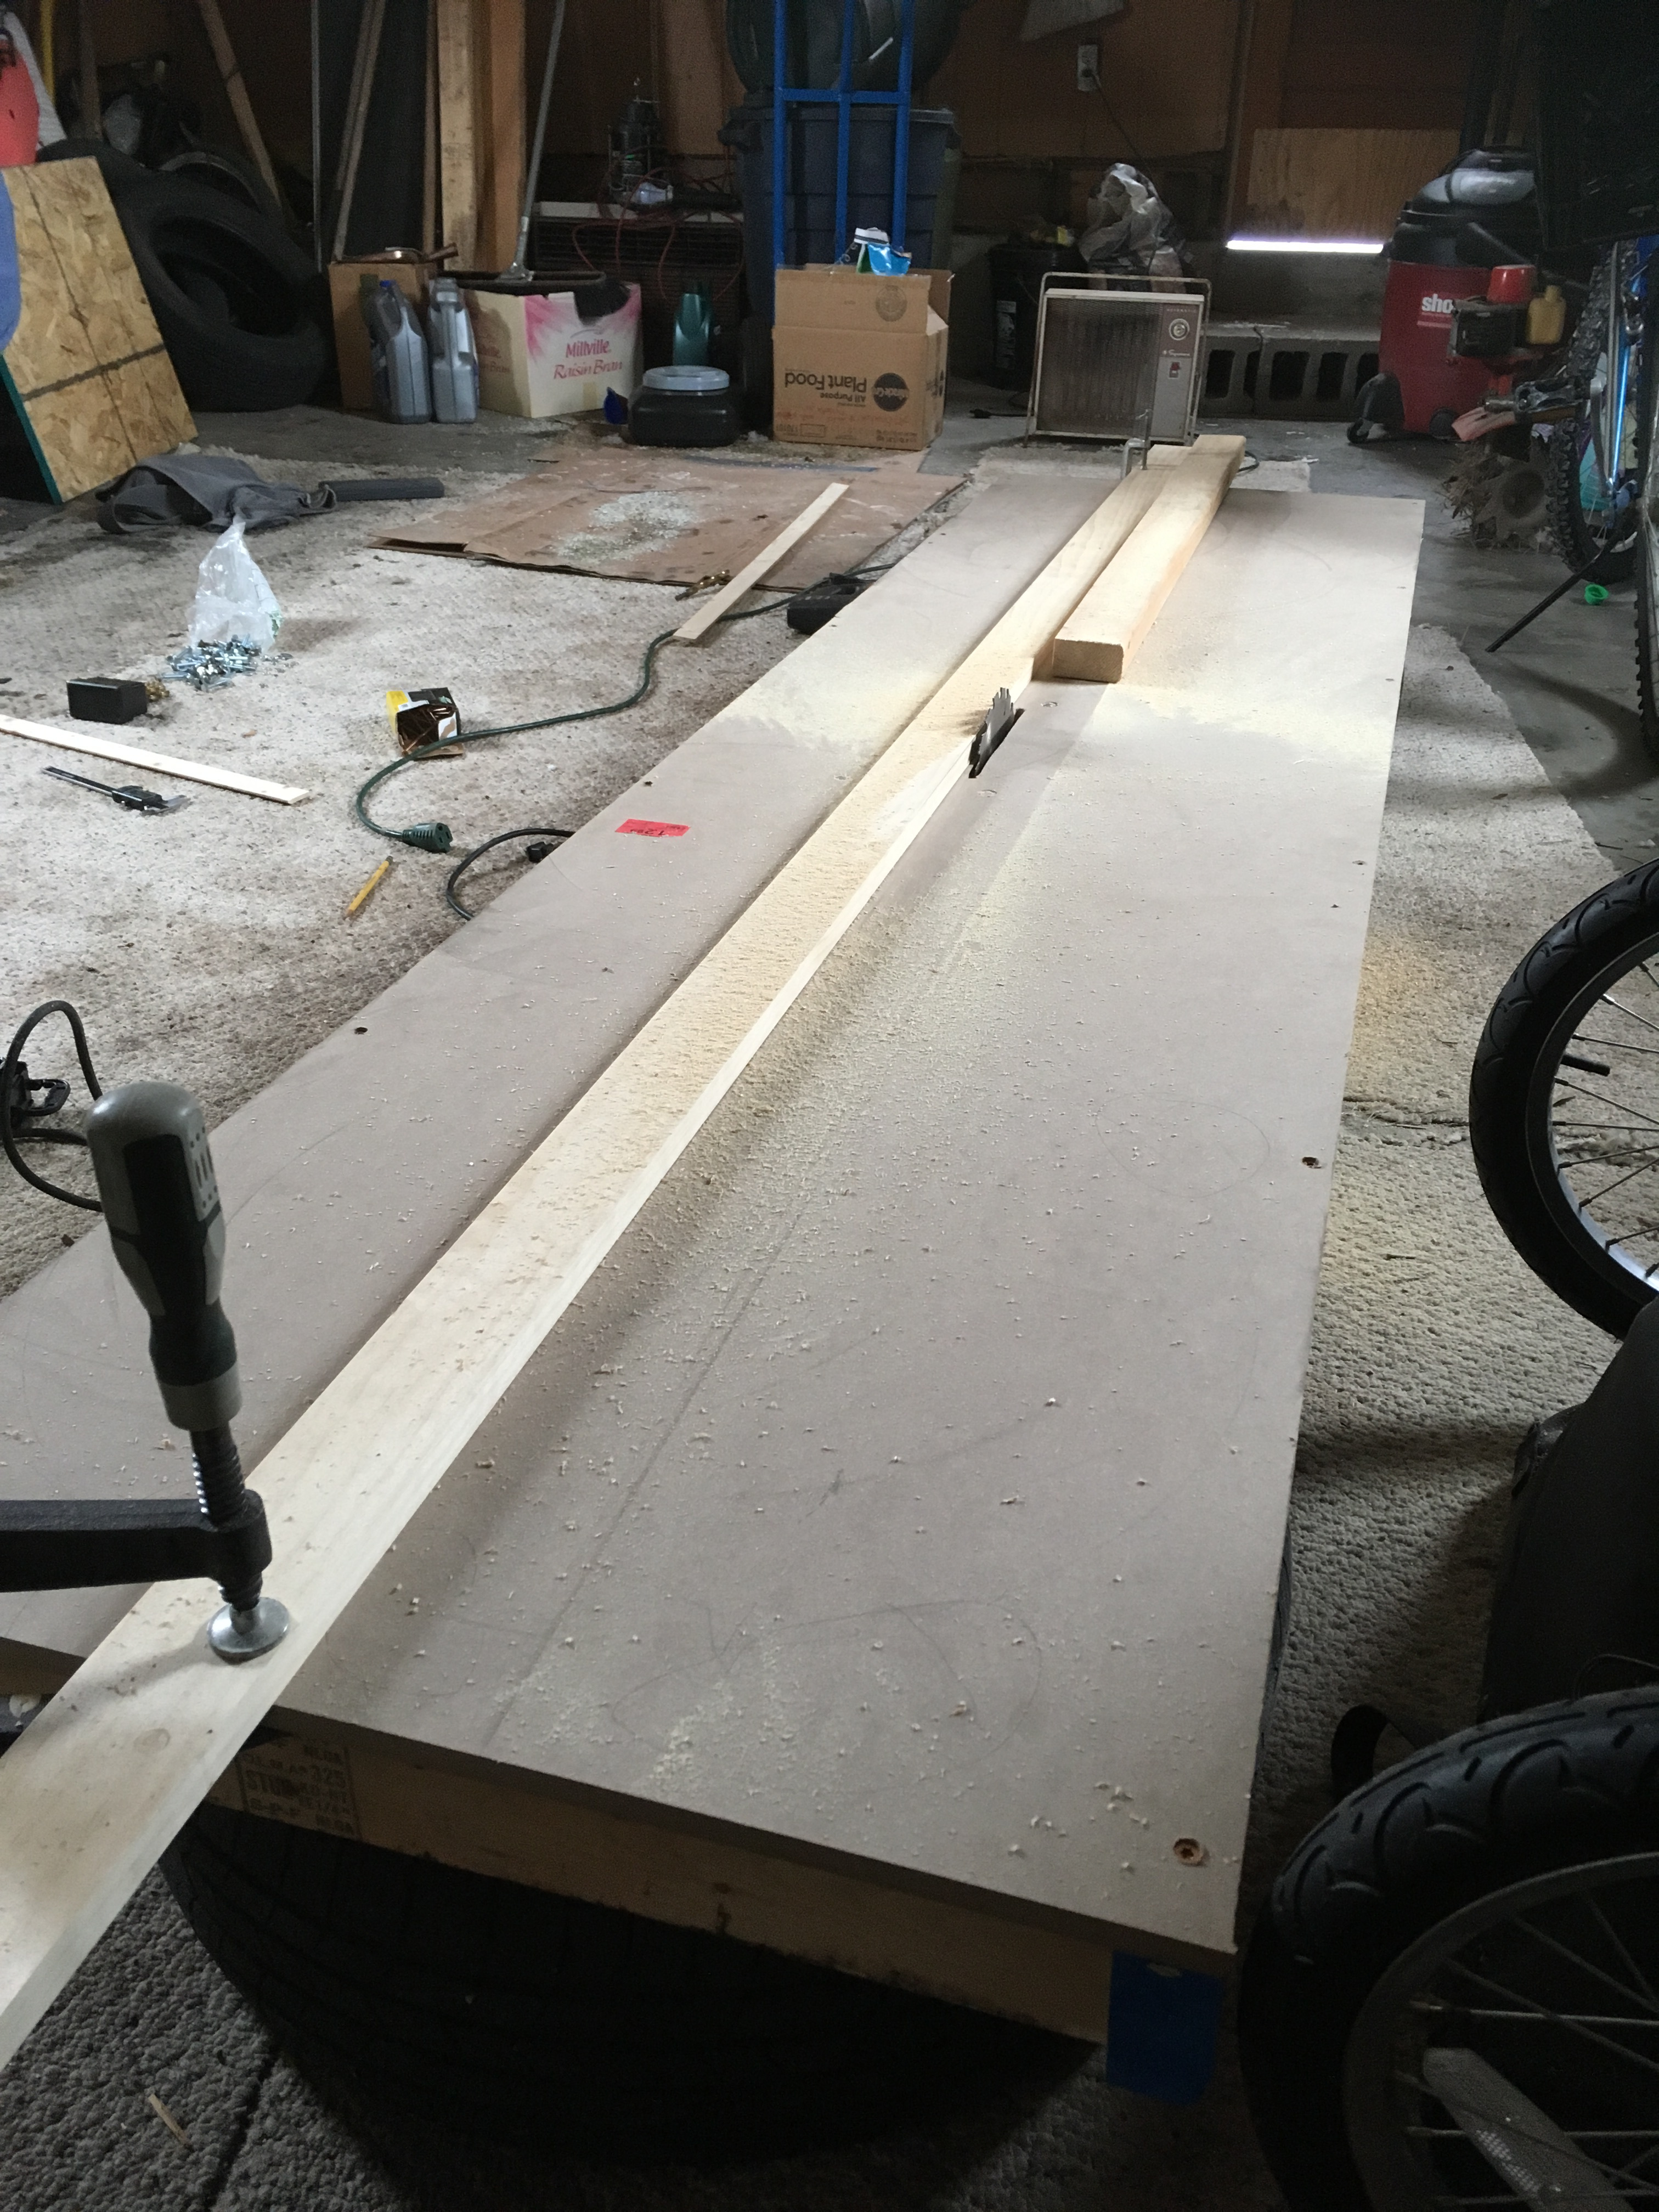
Ripping fractional inch sized strips of wood most certainly required a table saw: a tool not directly available at the time. Thus a poor-man’s table saw was constructed out of a hand-held circular saw (or “skill saw”) by means of attaching it to the underside of a table. Since this table was also being constructed at the time, reason called that it be as long as possible so that feeding in and out a long timber be as precise and effortless as possible.
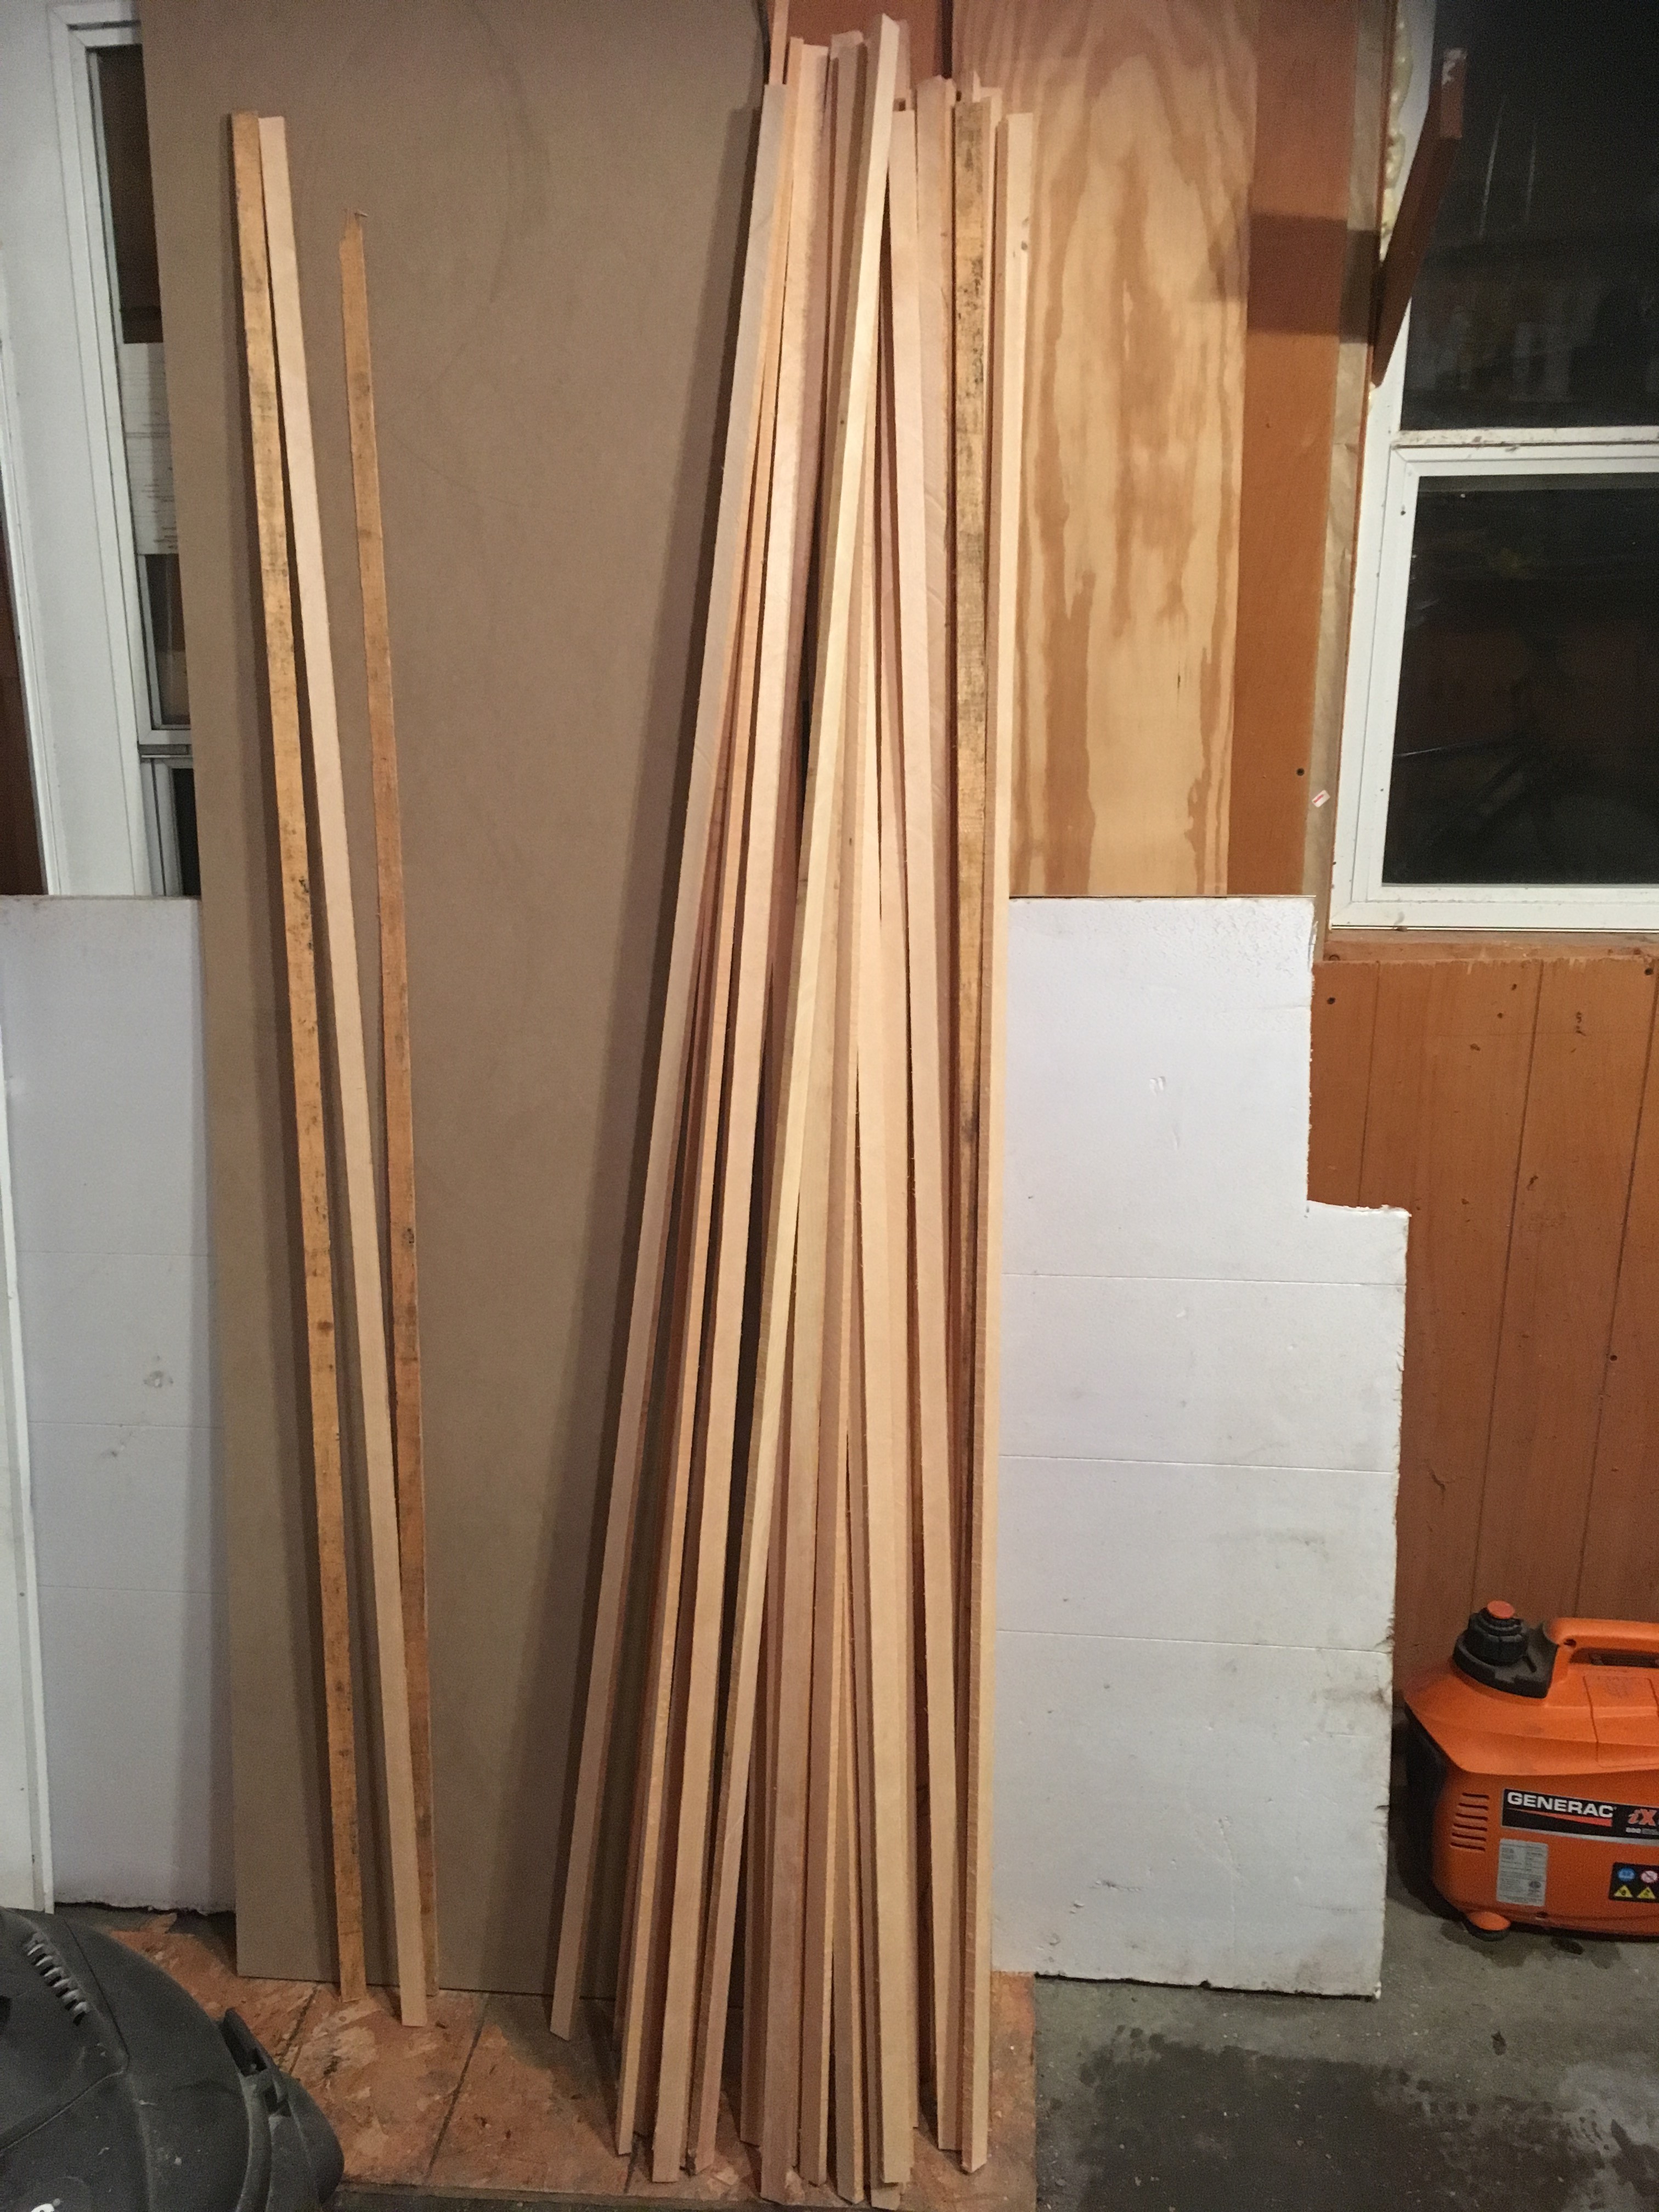
The wood purchased was roughly one inch thick, and eight inches in width. Accounting for material lost to blade kerf, the boards were first sliced into 1/2 inch widths, and each of those rotated and sliced into three 1/4 inch pieces each. The saw’s fence needed only to be reset once as all of the timbers could be sliced for the 1/2 inch dimension first. After which the fence was adjusted and all of those pieces sliced into thirds.
Inspection of the final collection of cap strips revealed that a knot on one side of the timber could propagate a curve in the grain many inches away. Wherever the maximum angle of the curve exceeded the specified 15:1 runout limitation specified by the FAA, the piece was cut out and discarded. Fortunately, enough of the cap strips were away from the curved grain that sufficient lengths according to the wing cord were found. The pieces that contained unusable wood were salvaged to construct the inner bracing of the ribs.
Gusset plates for the Pietenpol ribs are to be cut from 1/16″ plywood. Rather than paying for shipping of a large piece from Aircraft Spruce or Wicks, an online hobby shop was patronized which sold what was claimed to be “Aircraft Grade Plywood” for model building. At roughly four dollars per square foot, 1/16″ plywood in 1′ x 1′ pieces was ordered from Balsa USA who shipped quickly and without frustration. Samples of this wood were boiled for extended periods of time to verify the integrity of the glue. Delamination of any sort was not observable.
Initially, it seemed reasonable to cut out these gussets (which due to the AutoCad drawing had been designed unnecessarily unique to each other) on a CNC laser machine which was readily available in the university’s shop. However, when the facilities closed for the summer, that supply ended, and necessity gave birth to a superior method.
A layout of gussets on a 1’x1′ area was printed on sheets of paper and pasted together. A light coating of spray adhesive was applied to one sheet of plywood, and another affixed on top of it, and so on, making the stack eight or so layers thick. Finally the paper layout was attached on top, and the edges were taped with clear packing tape to prevent a saw from pulling it up. While the original intent was to use a band saw, an appropriate blade was not available, so a hand-held jig saw was used in stead. The stack was placed on a piece of thick foam allowing the jig saw to cut without the blade hitting the ground. This method proved superior to a CNC laser primarily because many gussets were cut at one time, speeding up the process.
Similar methods were followed to print, attach, and cut the layout onto a large piece of economical OSB to create the rib jig. Dozens of small blocks of poplar wood were cut from square dowls. These were predrilled to prevent splitting, and screwed onto the layout in such a manner necessary as to conform the cap strips to the plans.
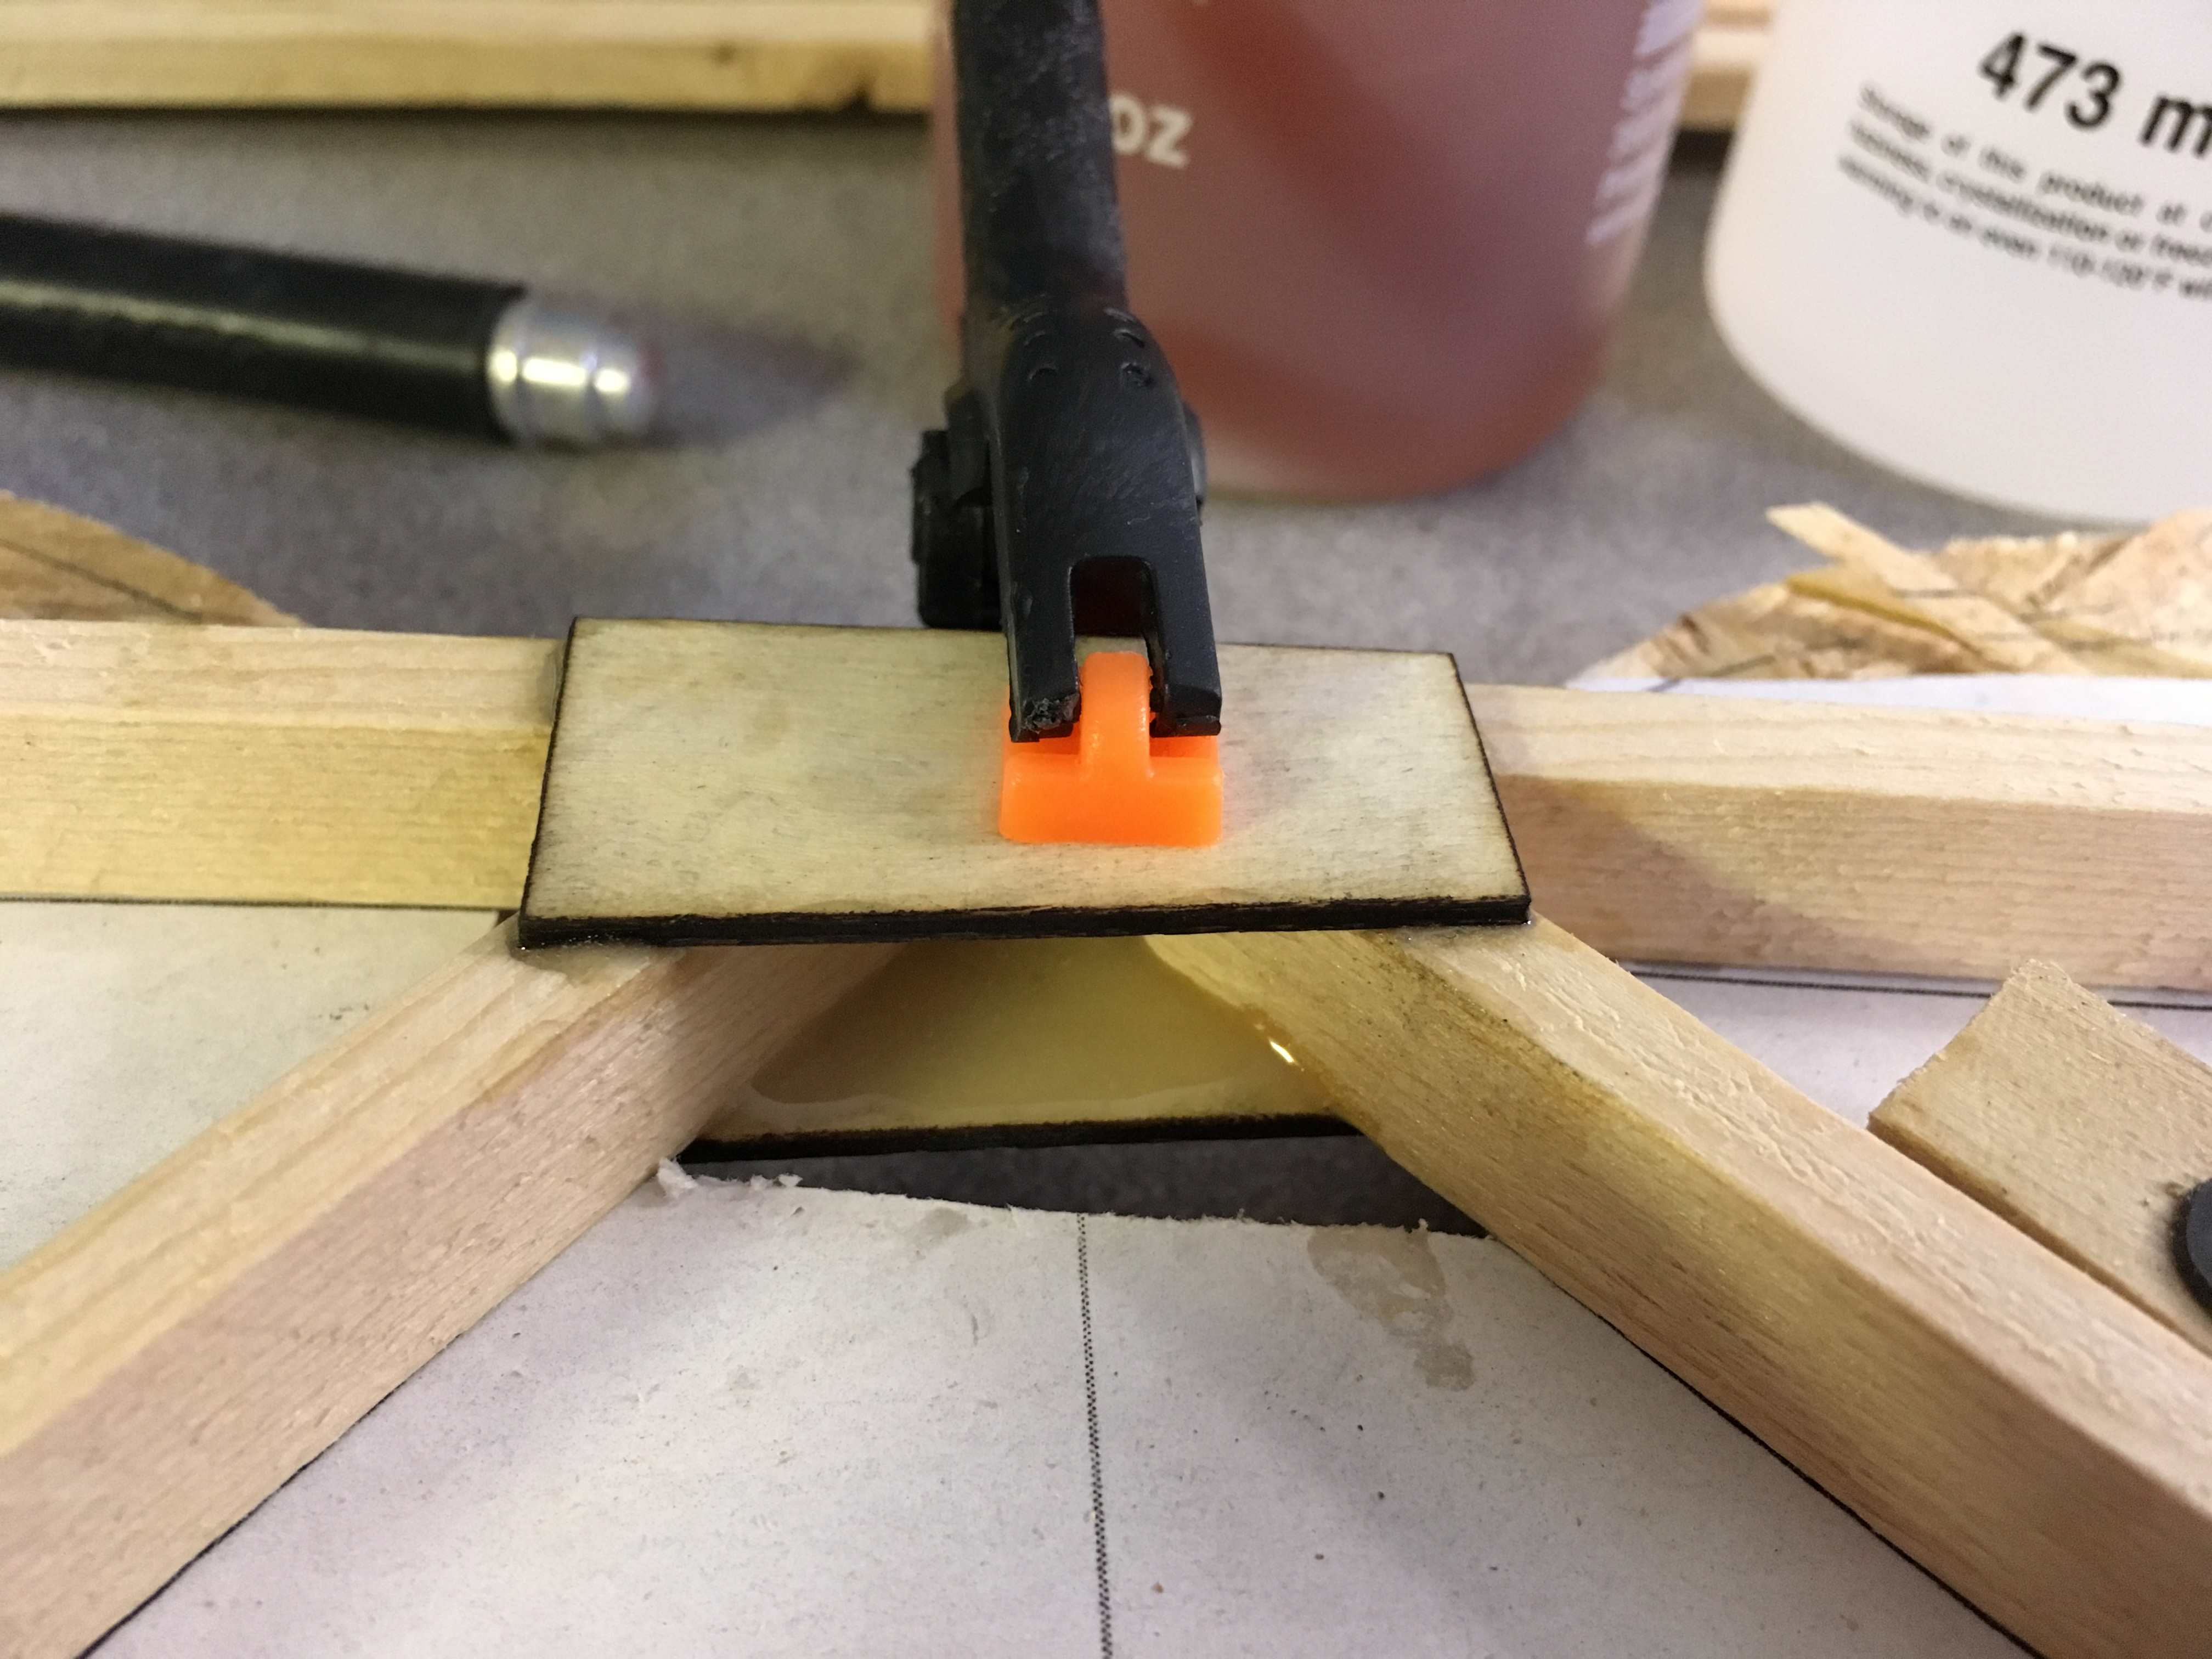
Cutouts in the jig allow for economical spring clamps purchased on eBay to hold the gussets in place while the glue dries. Epoxy is particularly suited to this method as the pieces need merely to be immobilized while curing. This is in contrast to traditional wood glues where the strength of the bond is somewhat proportional to the clamping force.
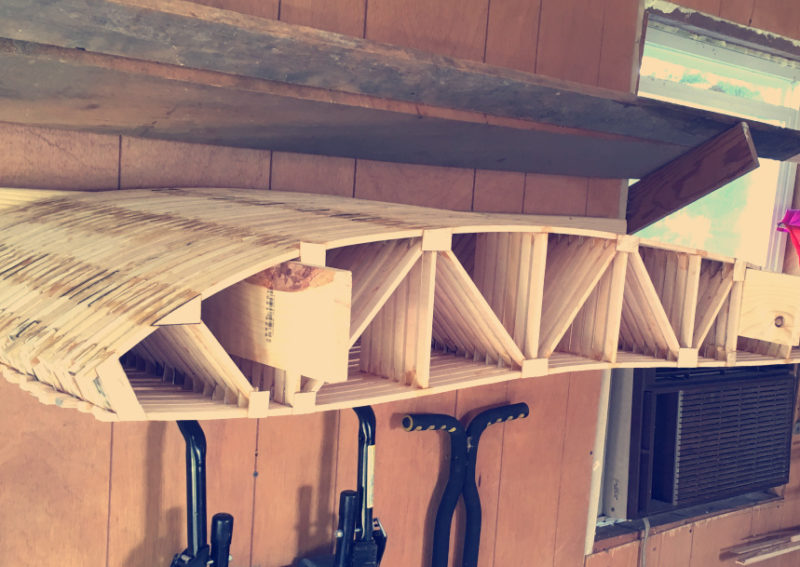
When cured, each rib should pop out of the jig with minimal effort and be nearly identical to the rib before it. In spots prone to sticking, a very small amount of grease was applied to the jig which masked some adhesion of the epoxy.
According to the plans, the ribs on the end of the wings are reinforced with vertical members which prevent the fabric from deforming the structure. Since the three-piece wing is being constructed, six of these reinforced ribs were built for a total of thirty-two ribs.