The high-level path I chose to follow for building the wooden structures was wing ribs, tail feathers, fuselage, and wing assembly. I say “wing assembly” because the bulk of the work has been done by the time the ribs are built; what remains is to put the ribs on the spars, and add all of the bracing and such.
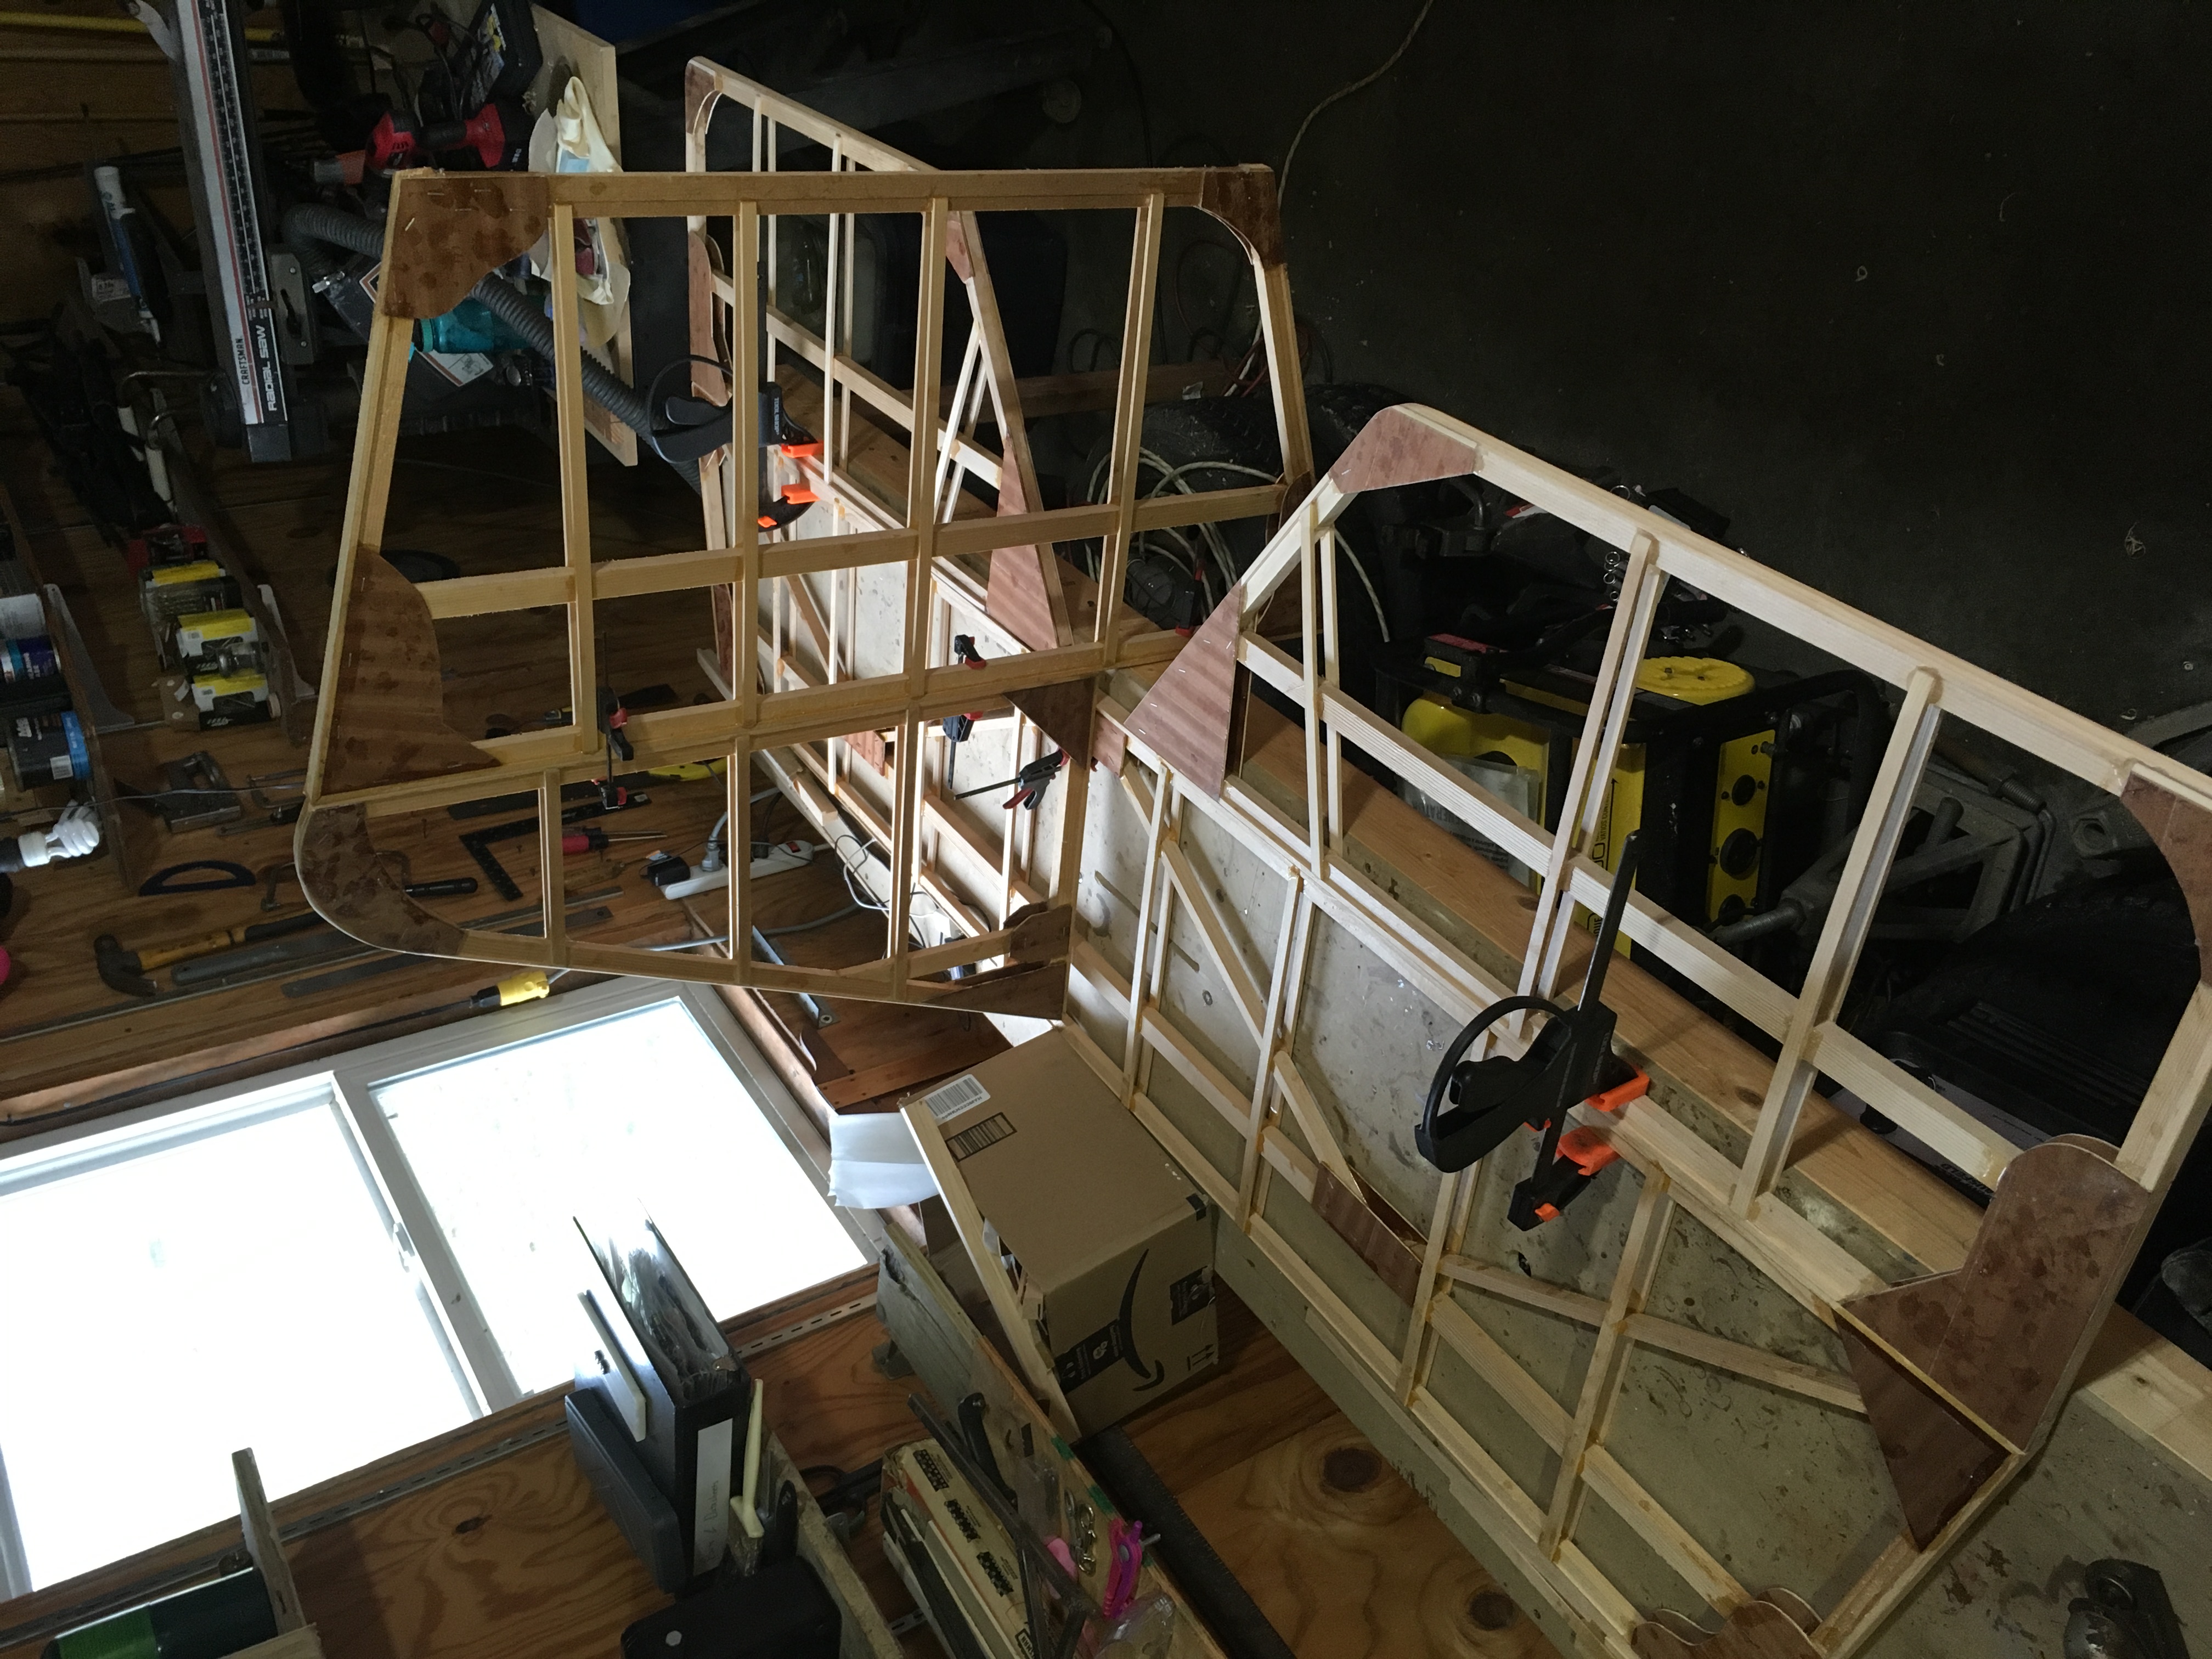
Building the tail feathers is quite a bit different than the wing ribs because it is not as repetitive. This sounds like it would be easier, but in fact it is more time consuming because a jig is built to hold the members in place per the plans, but then that jig is disassembled for the next part. Only the elevator jig is re-used to make both the right and left elevator.
For each piece, I began with one very straight reference line from which right angles and distances could be measured. The plans are not to scale, so they cannot be copied directly. They can only be read, interpreted, and re-drawn. In retrospect, drawing the wing ribs in AutoCAD was an unnecessary step. I could have just as easily drawn them with a pencil on a good piece of plywood and been done with it.
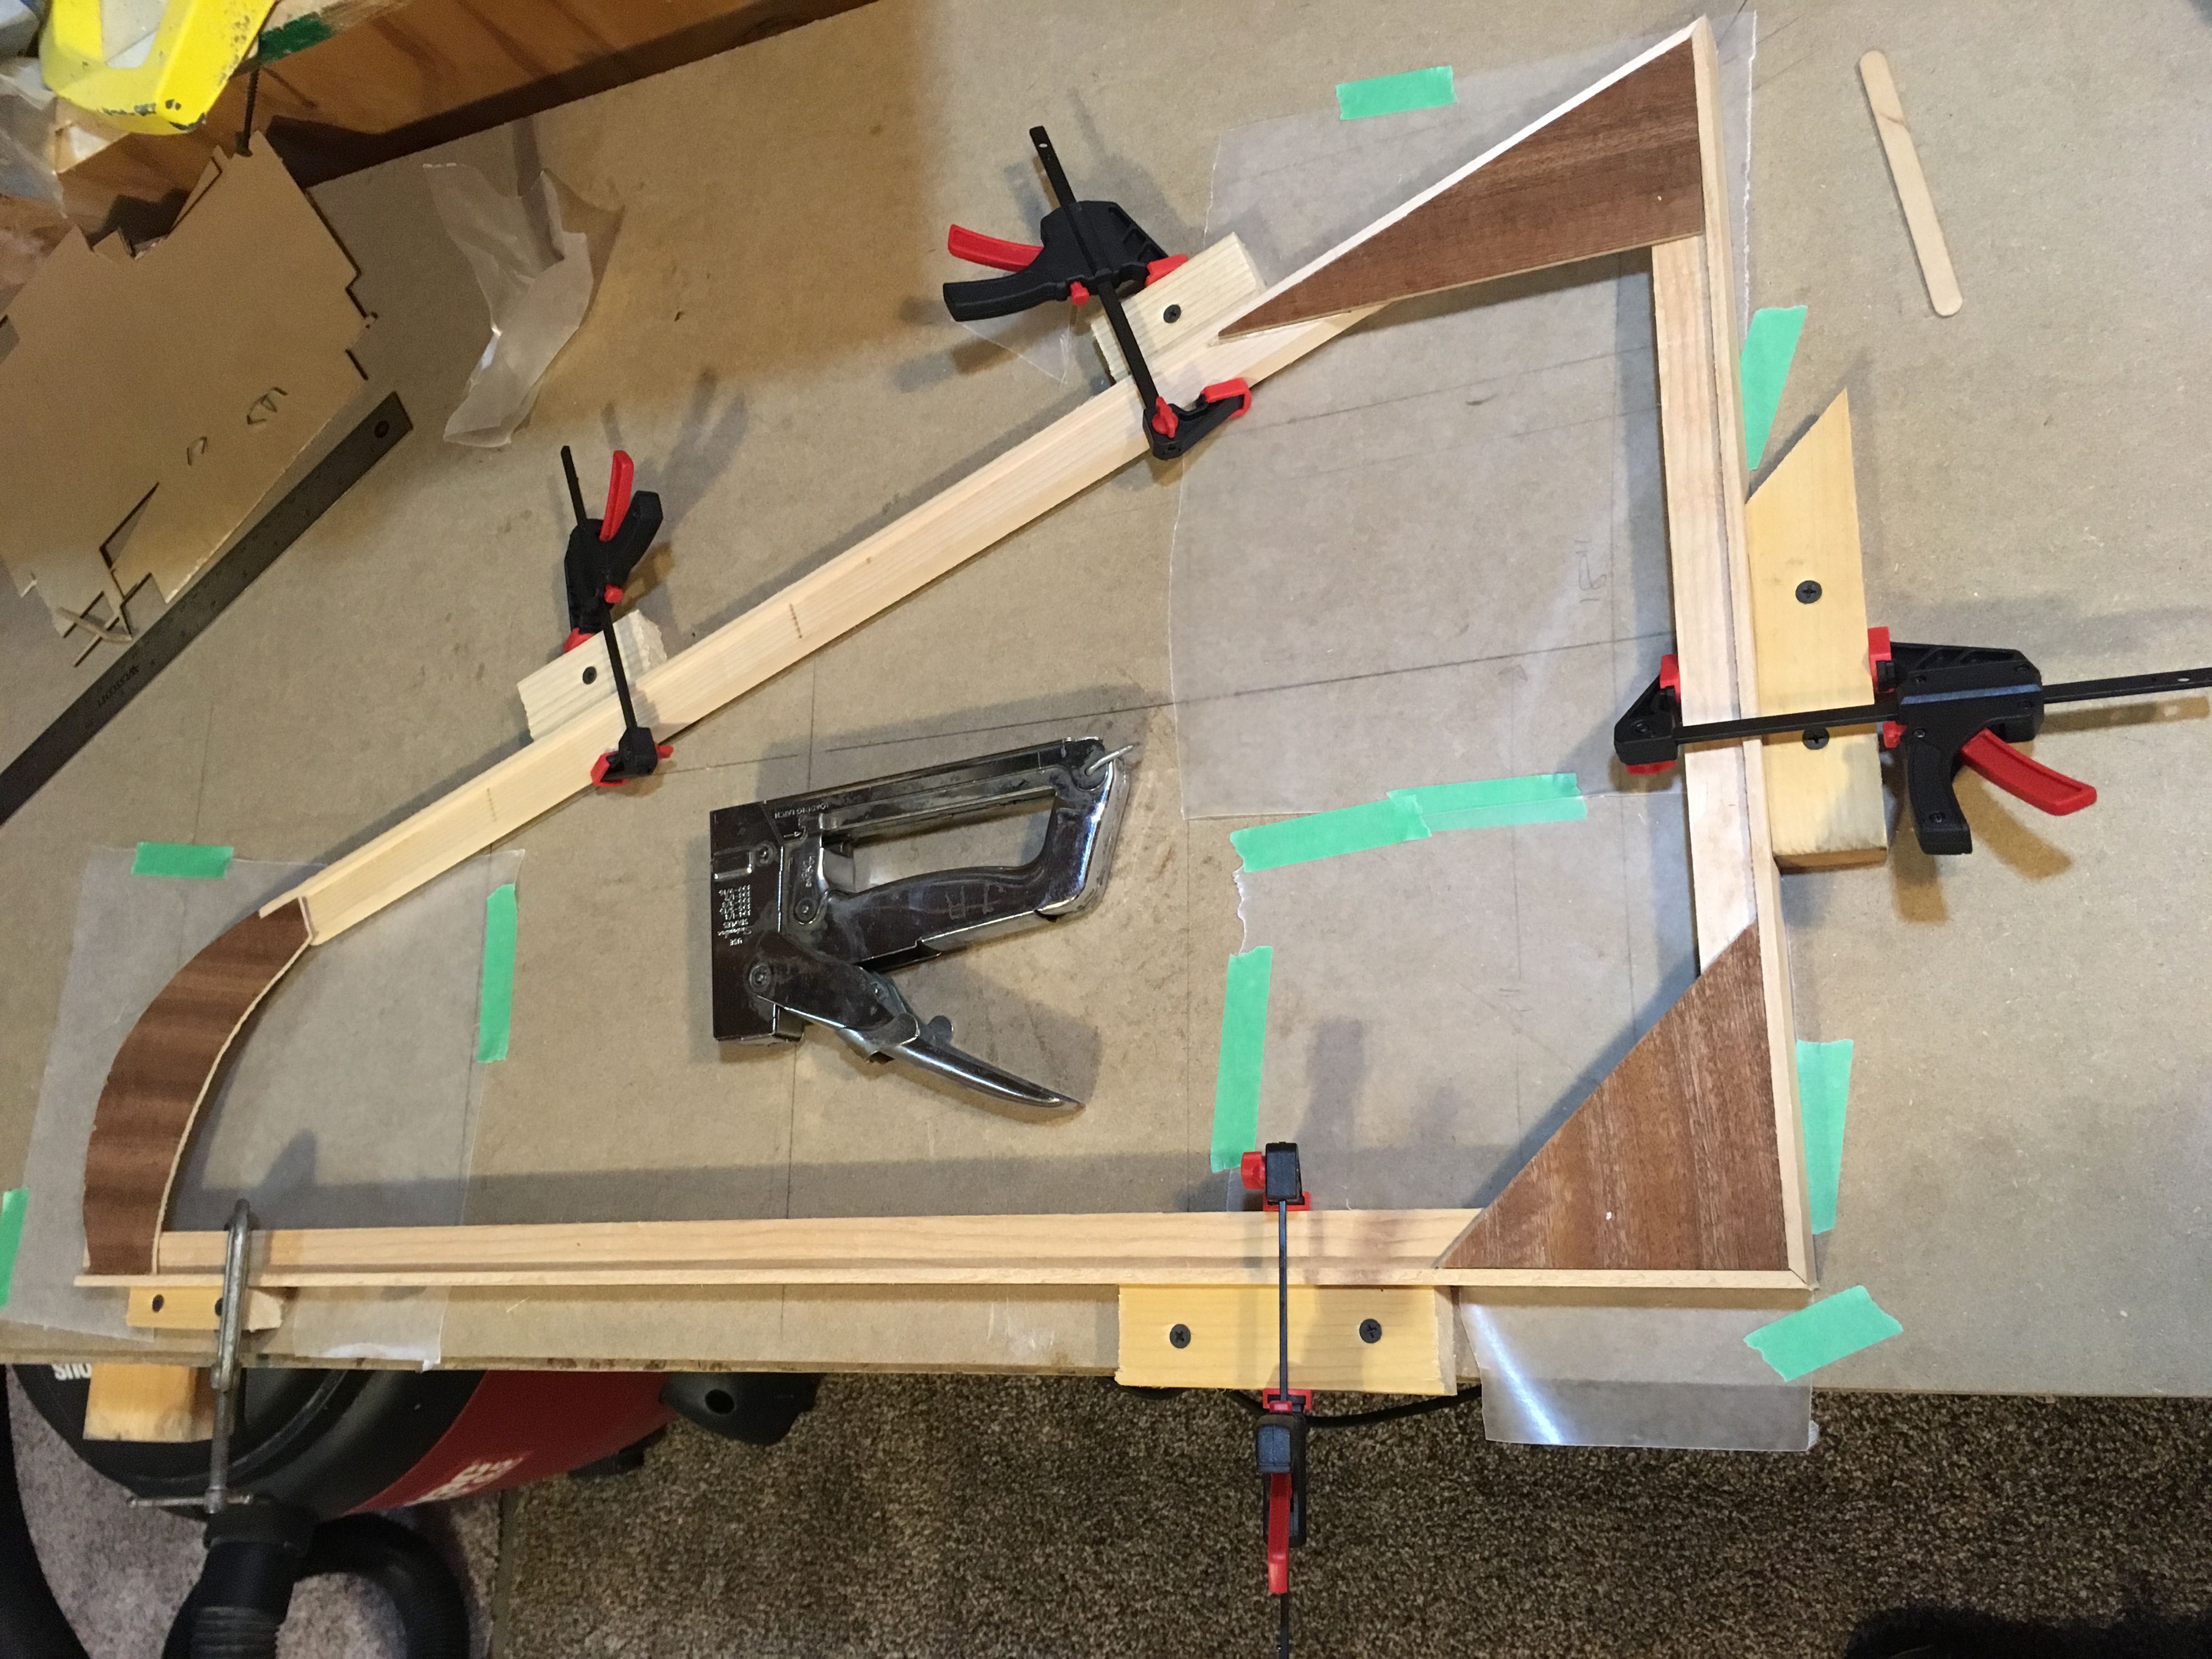 After drawing the basic shapes of one tail assembly on the MDF of my workbench, I would carefully add a few blocks of wood screwed in, and clamp the appropriate member to it. I repeated this process for each member in the plans until they were held securely in place with the proper dimensions and tight joints.
As an aside about tight joints, there is the understanding among Pietenpol builders that T-88 epoxy has “excellent gap filling properties”. This is true in the sense that it has a high tensile strength. If the gap is filled with cured glue, it will be rather strong. However, filling the gap can be problematic. Since the glue has a tendency to drip out before it is cured, the gap must be small compared to the viscosity and surface tension of the glue. Unfortunately, these properties vary with the temperature of the uncured glue. So on warm days, the gap filling properties of T-88 are MUCH worse, than on cold days. This means that as always in woodworking, it is best to have as small of gaps as possible.
The tail feathers are built with spruce members, and 1/8″ aircraft plywood gussets in the corners and at various other desirable places. There are usually two of every gusset: one on the top, and one on the bottom. My strategy therefore was to cut the gusset shapes out of cheap dollar store foam board (I am familiar with this material from building RC airplanes) and then trace that shape on to the plywood. There are several advantages to this method. First, if the first pattern created doesn’t fit, you haven’t wasted expensive plywood, only foam board. Second, each plywood gusset is made from the same traced foam board shape, thus they are somewhat similar even after being cut with a jig saw (more on that later). Thirdly, several gusset shapes can be traced on the same piece of plywood after being arranged as best as possible to make good use of the plywood area.
Initially, I thought I must have a band saw to cut out the plywood shapes with precision. While I would like to have a bandsaw, I do not. A co-worker at my engineering co-op suggested putting a thick piece of insulation foam under the plywood, and running a jigsaw through it. This is an excellent idea because the large piece of plywood can stay in place, and the saw can be maneuvered through it. Additionally, the foam will prevent most tear-out on the reverse side of the plywood, especially if a jigsaw blade is used which cuts on the down-stroke, avoiding tear-out on the up-side. I have also used this system on the 22 gauge steel for building control horns. Though it is a hotter smellier mess when cutting steel, it does work.
 Once each gusset was cut out, the members were glued at the joints, and the gussets were glued in place. Clamps held the spruce members to the jig blocks, while staples were used to hold the gussets to the members. Remember with epoxy, the pieces need only be immobilized. Clamping pressure does not improve joint strength.
Invariably, there were drips of cured epoxy on the inverse side. They can be removed with a chisel if care is taken to avoid tearing away the wood. Other methods include removing the glue a slice at a time with a sharp hand plane, or heating the epoxy with a hair dryer or heat gun to be soft enough to remove without damaging the wood.
As another aside, T-88 epoxy is unchanged after cooling if it is heated to no more than 160 degrees F. Beyond that, the heat can permanently affect the strength of the glue. I verified this via email with System Three.
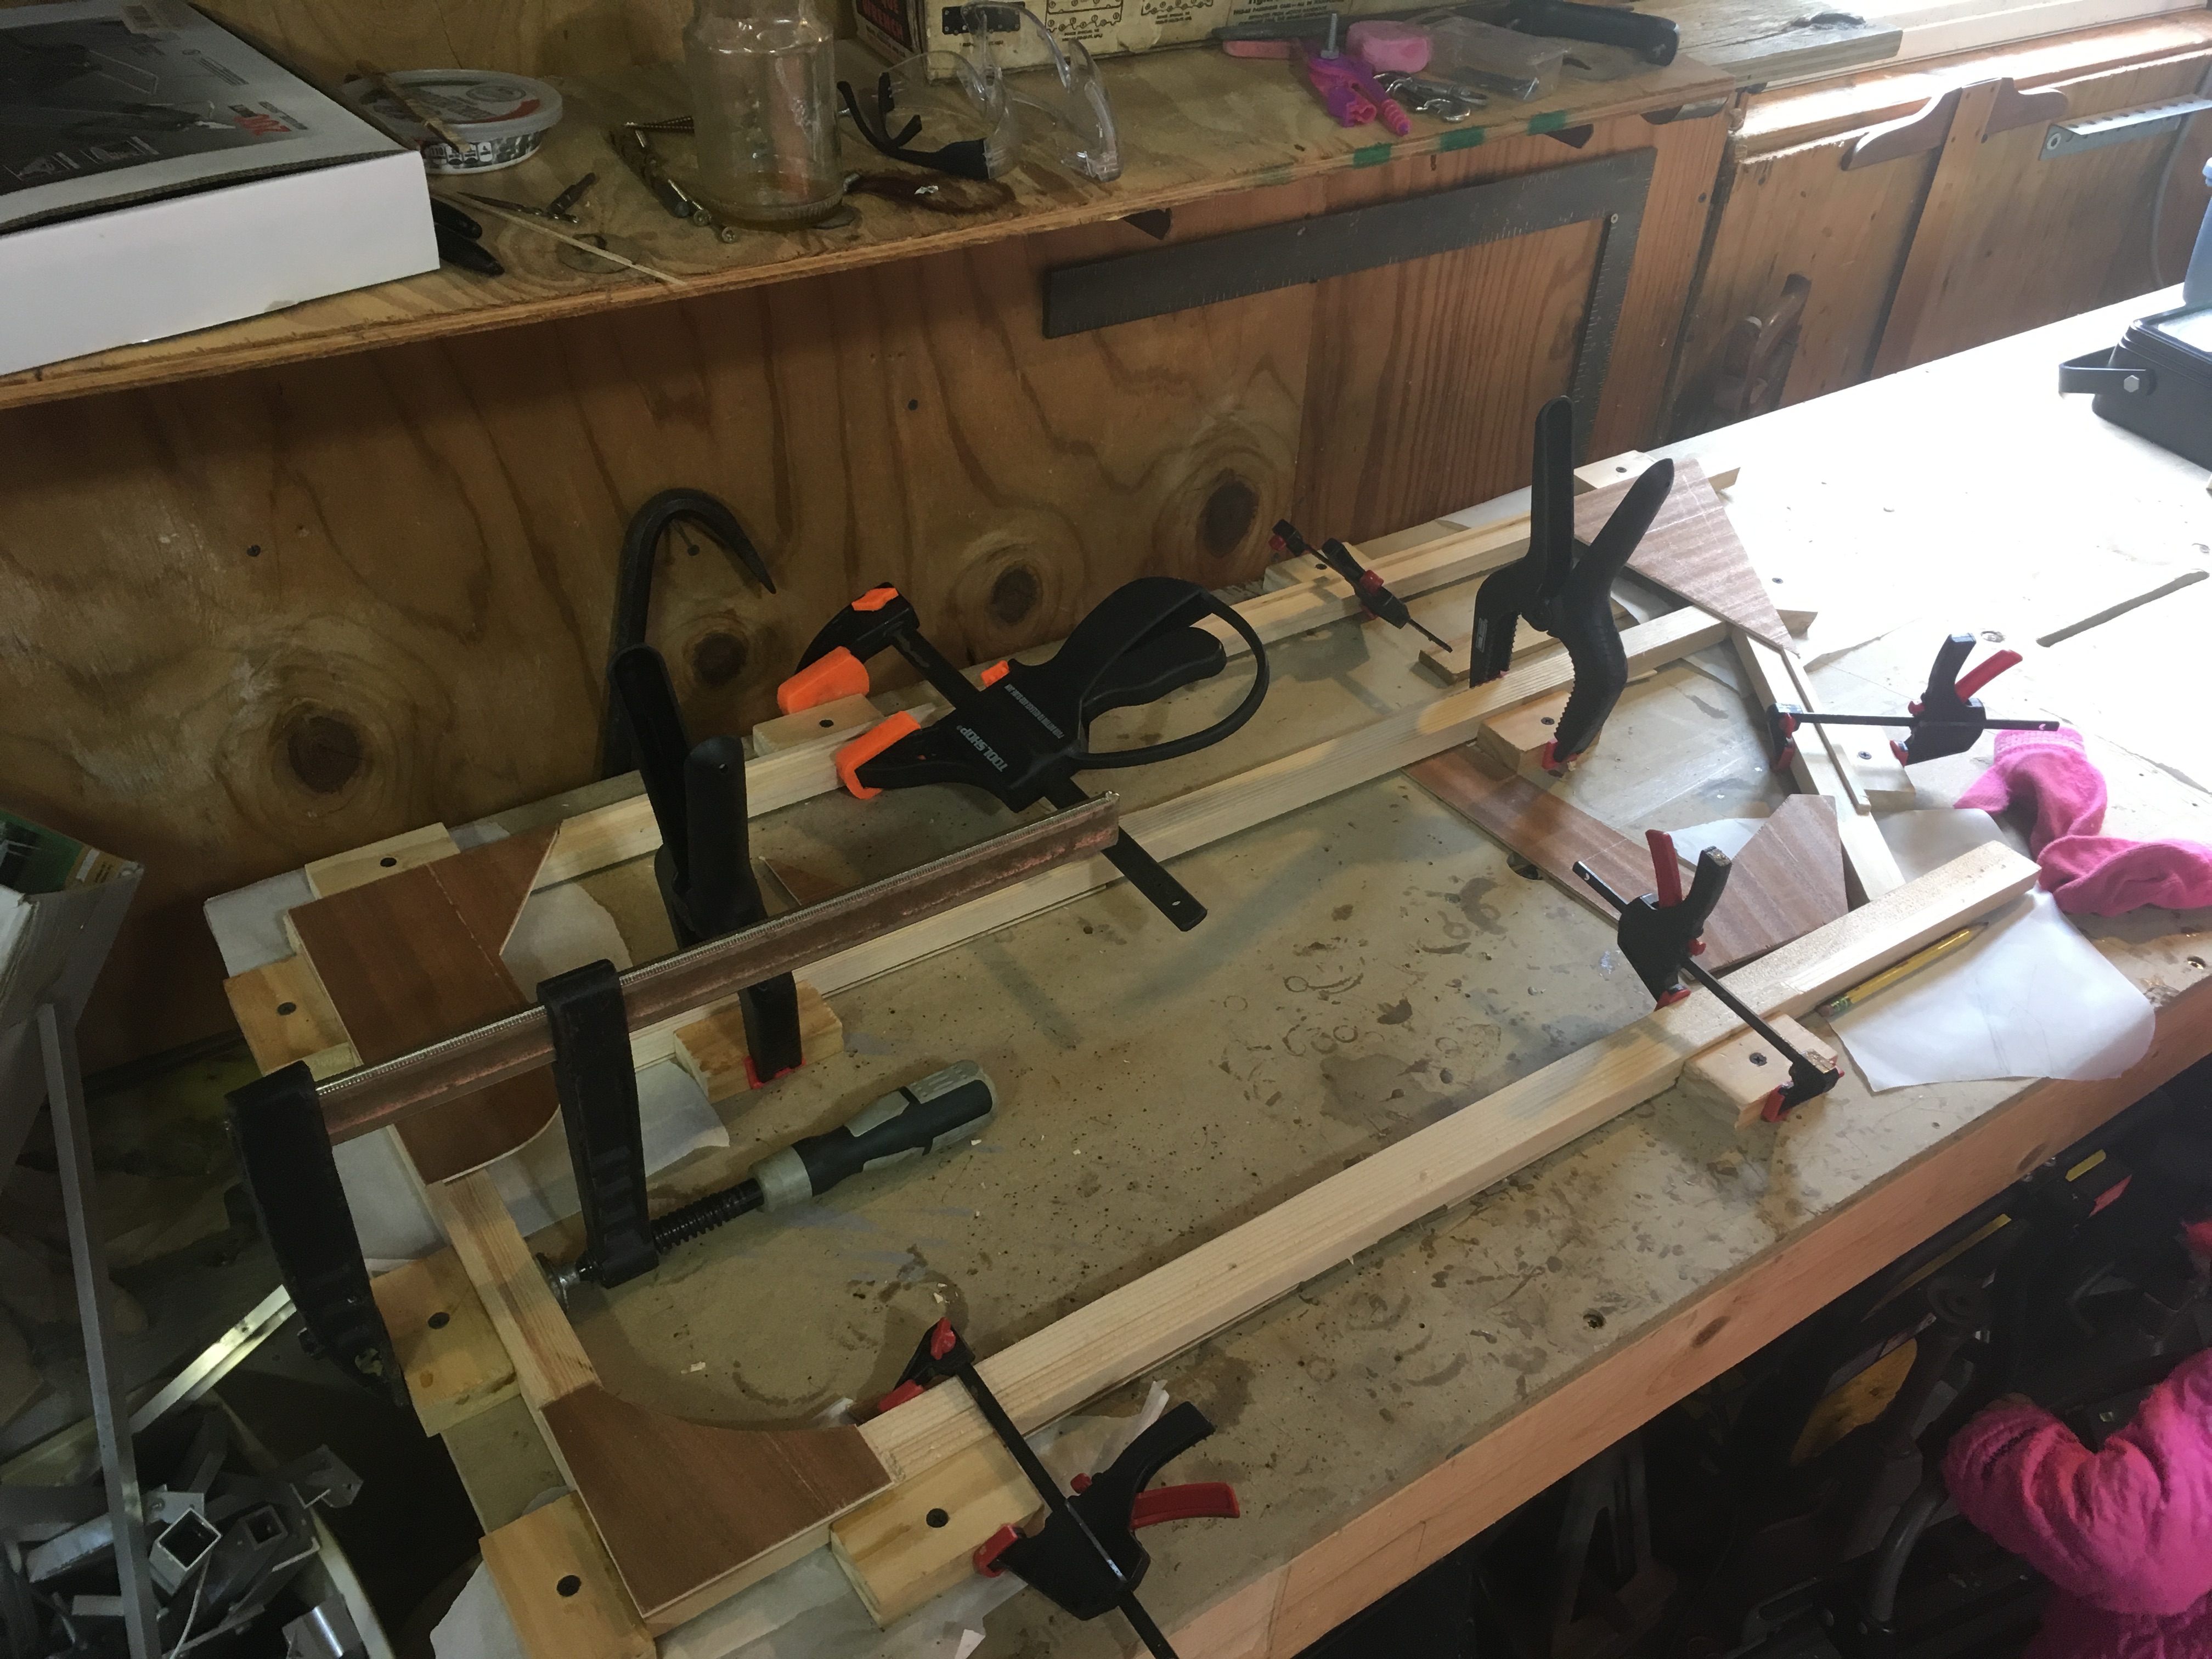
The opposite side gussets can then be applied in a similar manner. This time, the members need not be clamped to the jig, and the piece is mostly sitting free on the bench.
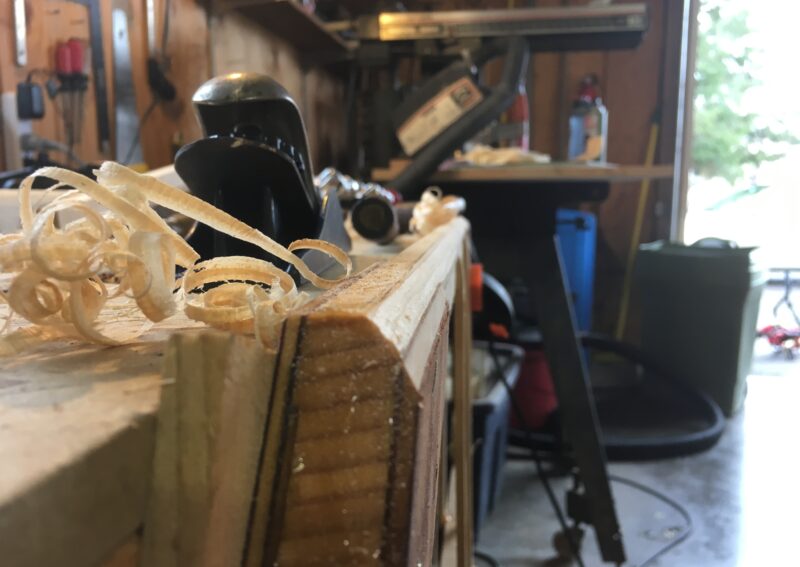
In the plans for the Pietenpol, general shapes are called out for the leading and trailing edges of the tail feathers. I chose not to shape these pieces before assembling the feather. Rather, my method was to leave them square, and after the tail feather was built, I clamped it vertically against the table, and carefully shaped the edge with a hand plane. Though I’m sure there is more than one valid way to do this, I chose this method because the prospects of clamping a rounded member squarely to the jig seemed dubious.
Once each tail feather had been shaped satisfactorily, it was hung on the wall as an elaborate decoration until it was needed. Just for fun though. I clamped them all together so that I could get a feel for what the entire tail assembly might look like.